

Most of us have had images that have a colour cast to them at one point or another and there are a multitude of methods for correcting neutralizing this cast.
This is a relatively simple method that will work with MOST images.
Duplicate the image and then use Filter>Blur>Average.
Add a Levels (or Curves) adjustment layer (Layer>New Adjustment Layer>Levels or Curves or use the drop down menu on the layers palette).

Use the Set Gray Point eyedropper (the middle eyedropper) and click on the duplicated/averaged file.
Uncheck the eye of the blurred layer and the adjustment layer should now have neutralized the colour cast.
Cheers,
Lars
Photo of the Day:
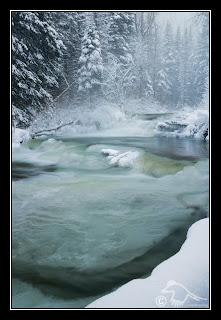
"While winter brings its own challenges for photographers, one would be remiss in not getting shots such as this where patterns and colour come together in a winterland of white to provide contrast"
The Photo of the day as well as all my Photos are available as LImited Edition Prints, Small Prints, or as Fine Art Photography Cards that come with their own envelopes at Larsphotography.com


1 comment:
I hadn't realized about the adjustment layers - thanks! This will make corrections so much easier!
Post a Comment